In the Cloud file management pane (remote pane), you can manage online files and folders in the same way as in the Windows Explorer window.
- Structure of your online storage
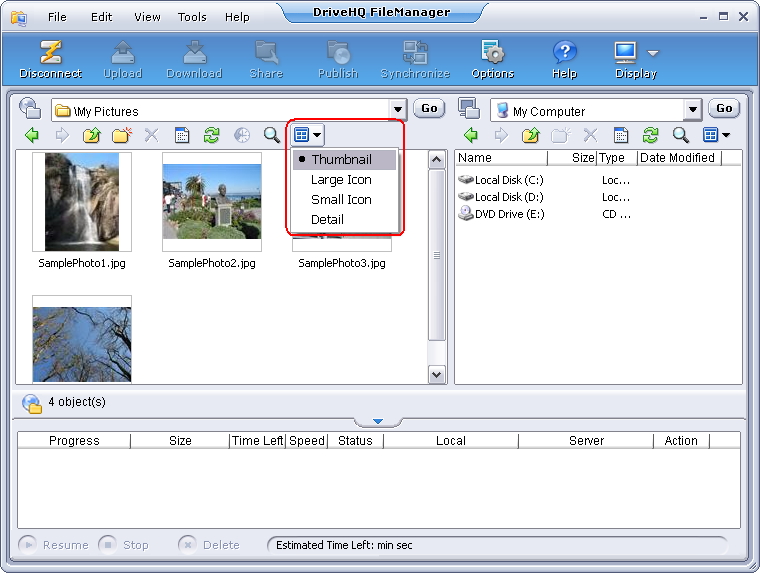
The default user interface displays the remote files on the left-hand side and local files on the right-hand side; this is like a lot of FTP client software.
You can click on the Display button to change the layout. Click on Display button, and then it will display a pull-down menu, as shown below:

If you select Show DriveHQ.com files only, it will display the following dialog:
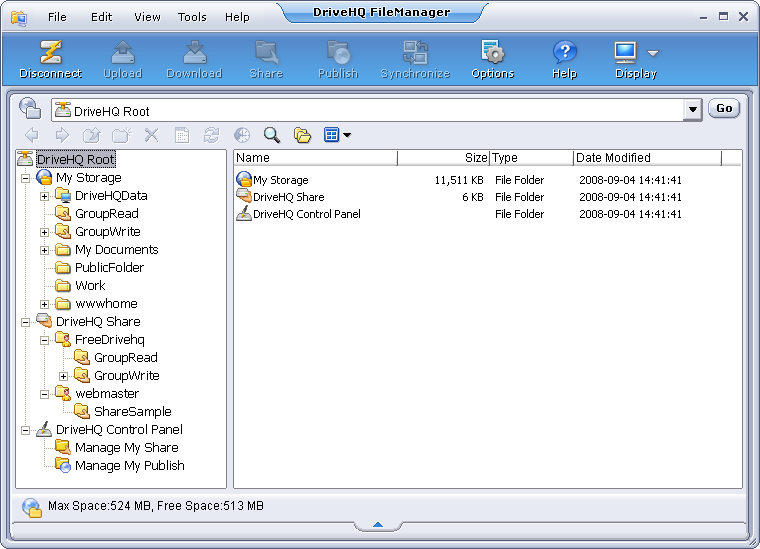
When showing DriveHQ.com files only, it displays the remote folder tree on the left-hand side; on the right-hand side, it displays the selected folder contents.
As you can see in the left-hand side, the root folder is DriveHQ Root, which is not a real folder. It is a virtual folder containing 3 more folders:
- My Storage folder: It is also not a real folder. It is a virtual folder that contains all folders and files of this user account.
All folders / files inside of "My Storage" virtual folder are real folders / files. These folders / files are owned by this user. By default,
folders and files are secure and private, unless shared to other user(s) or published for anybody to access. Users have full access to files / folders in their
own "My Storage" folder, incl. create folders, upload files, edit / delete / download files / folders, share / publish folders and files, etc.
- DriveHQ Share folder: This folder is a virtual folder, which contains all folders / files shard to this user by other DriveHQ members.
On the above screenshot, you can find 2 folders in "DriveHQ Share" folder: "FreeDrivehq"and "webmaster".
These are still not real folders. These are the usernames (and virtual folders) who shared folders to this user.
As you expand the username "FreeDrivehq", you can see two folders: "GroupRead" and "GroupWrite".
These are still not real folders. They are "Shares" created by the user "FreeDrivehq". So the folders in "DriveHQ Share" has the format of:
[\DriveHQ Share]\USER_NAME\SHARE_NAME\FOLDER_NAME\...
-Or-
\\USER_NAME\SHARE_NAME\FOLDER_NAME\...
Where "DriveHQ Share", "USER_NAME" and "SHARE_NAME" are all virtual folders. Virtual folders cannot be deleted or renamed. So when you right click on a virtual folder,
most of the popup menu items are disabled.
Usually you cannot upload files to a "virtual folder", except the "My Storage" virtual folder and share names like \\USER_NAME\SHARE_NAME\.
- DriveHQ Control Panel folder: It is a virtual folder linking to all tools for setting up your account options and managing the share and
publish lists. The same functions can also be accessed from the Tools menu.
- Navigate through online files and folders
- Select the destination folder from the drop-down list on the top right corner;
- Enter a folder by double-clicking it in the online pane;
- Click
 to go to the folder visited previously;
- Click
 to go to the folder visited next;
- Click
 to go to the parent folder.
- Create new online folders
- Click on
 button to create a new folder, and specify the folder name;
- Or, right-click the online pane area, other than the file names, select New from the popup menu, and choose the Folder option.
- Rename online files and folders
Click the folder/file to rename, click again or right-click and select Rename from the popup menu; enter the new name, once the name edit box is shown.
- Copy / Paste online files and folders
Right-click on the file / folder to copy, and select Copy from the popup menu; navigate to the destination folder; right-click the online pane area, other than file names, select Paste from the popup menu.
- Delete online files and folders
Select the file / folder to delete, click on  button or press Delete key; Select Yes from the message box if you want to delete, or select No if you don't.
- Set view options on online files and folders
DriveHQ FileManager can display folders using Thumbnail / Icon / Detail Views. By default, it displays folders in detail view. You can change it to other view by clicking in the toolbar, as shown below:
- Arrange files in a folder
Right-click the online pane area, other than the file names, select Arrange Icons By from the popup menu, and choose from four options: "Name", "Size", "Type", and "Modify Time".
- View properties of online files and folders
Select the file / folder to view property, click  button, or right-click the file name, and select Properties from the popup menu.