Email Server Hosting Service for Businesses
Get a DriveHQ Email Account
When you register a new account on DriveHQ.com, you automatically receive a DriveHQ email account.
The email address is YourUserName@firstcloudit.com. Please note DriveHQ is not a free email hosting service provider. Free service users (incl. True Members)
can only try our service for free.
You can upgrade your account to a regular paid account by ordering a storage subscription plan. Your email storage and file storage are combined
to calculate the total storage usage.
Create Multiple Business Email Accounts
To create multiple email accounts for a business, you need to use our Group Account service.
If you are not already a group account, you can upgrade to a group account for free, which includes one sub-user license.
You can create a subuser for each email account. By default, the email address is: SUBUSERNAME@firstcloudit.com. If you
set up your own company domain, then the email address will be SUBUSERNAME@YOURDOMAIN. You can also create one or more email aliases
for each email account.
DriveHQ Email Service is for regular businesses. You cannot use our service to send spam emails, bulk emails or phishing emails, etc.
Service abuse is automatically monitored and violators are disabled immediately without warning.
How can I access my DriveHQ email box?
Log on to your account. You can click on "EMAIL" at the top of page to use your email function. With our support of SMTP/POP3 based email service, you can now use any email client software to access DriveHQ email.
Unlimited Message Box Size
Your maximum message box size is combined with your file storage size. In case you need more storage space , or if you have a heavy-traffic website, you need to subscribe to our storage subscription service.
Integration with DriveHQ Storage Service
When you compose a message, you can attach a local file or a file on DriveHQ.com; when you receive a message or email with attachments on DriveHQ.com, you can save the attachments to your DriveHQ folder. This method can also be used as a way of uploading files to DriveHQ.com.
How to configure Outlook Express to support DriveHQ Email?
With our support of SMTP/POP3 based email service, you can now use any email client software to access DriveHQ email. For Microsoft Outlook Express users, please see the instructions at the bottom on how to configure DriveHQ email service.
SMTP/POP3 based email is much easier to use than any web-based email. Many email client applications offer powerful features such as message rules, advanced editing, filtering and searching, etc. You also can configure multiple email accounts in one email client. More importantly, you can easily download emails to your local computers, so that emails will be available offline; and by deleting emails on server, you get virtually unlimited mailbox size!
You can configure Outlook Express to support DriveHQ Email by the following steps.
1. Lanuch Outlook Express, in the Tools menu, click Accounts .
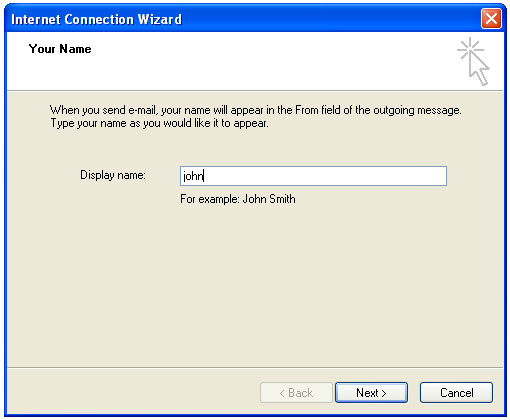
2. In the Internet Accounts dailog box, click Add , then select Mail to open the Internet Connection Wizard. Enter your Display name :
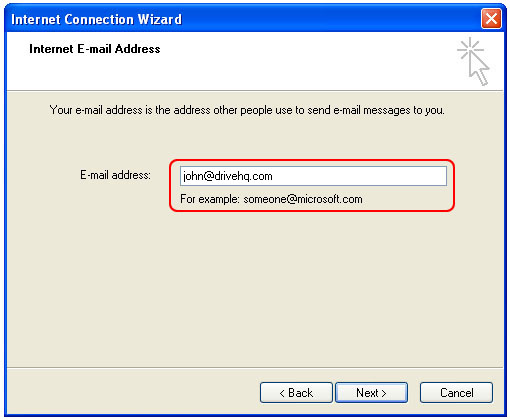
3. Enter your DriveHQ.com email address, which is YourUserName@firstcloudit.com.
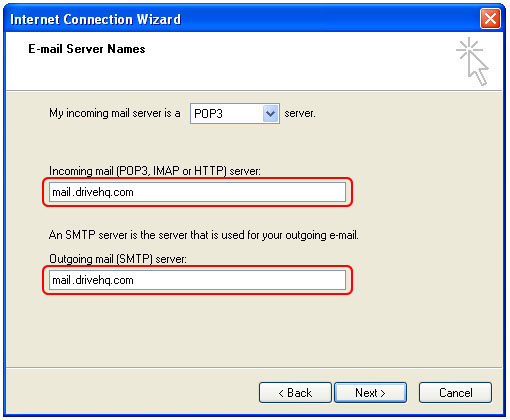
4. Click Next , then enter E-mail Server Names . Both POP3 and SMTP servers are mail.firstcloudit.com .
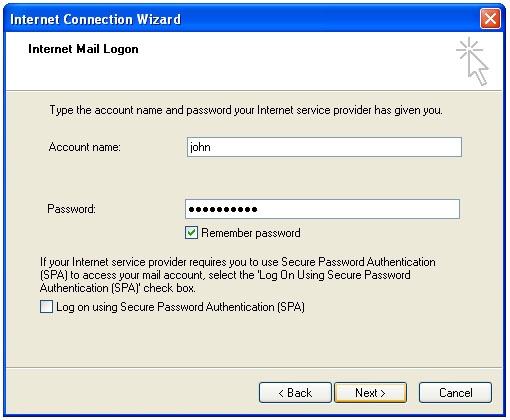
5. Click Next button, it goes to the Inernet Mail Logon screen. Enter your DriveHQ username and password in the required boxes. If you select Remember password option, you do not need to enter your account info again the next time you lanuch Outlook Express.
6. Click Next button, you are almost done configuring your DriveHQ email. Click Finish to finish the wizard.
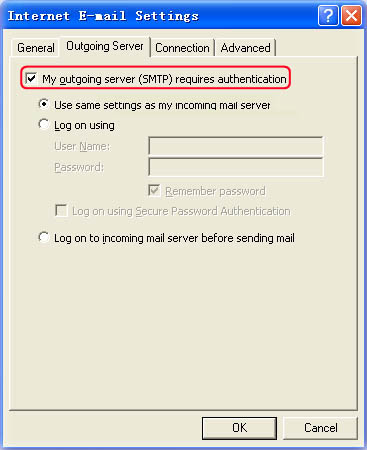
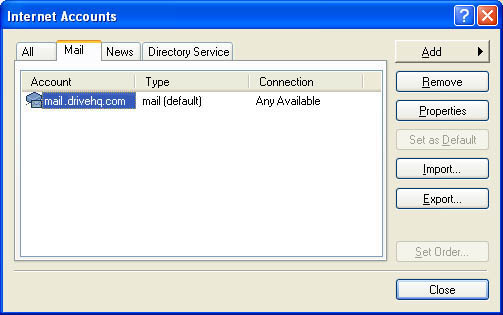
7. DriveHQ outgoing server requires authentication, so you must configure the outgoing server. Firstly, in Tool menu, click Accounts . In Internet Accounts page, click Mail tab, then click Properties button, shown as bellow:
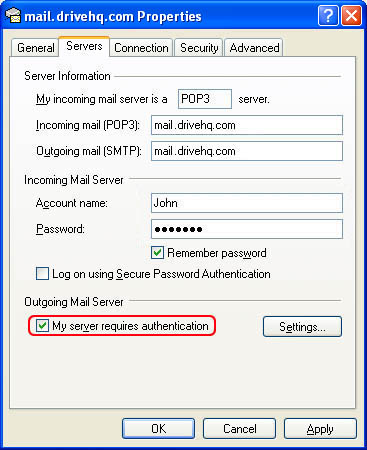
Click Servers tab, check Outgoing Mail Server , select My Server requires authentication . Click OK and close the dialog. You are ready to use DriveHQ email.
How to configure Outlook to support DriveHQ Email?
You can configure Outlook to support DriveHQ Email by the following steps.
1. Lanuch Outlook, in the Tools menu, click E-mail Accounts .
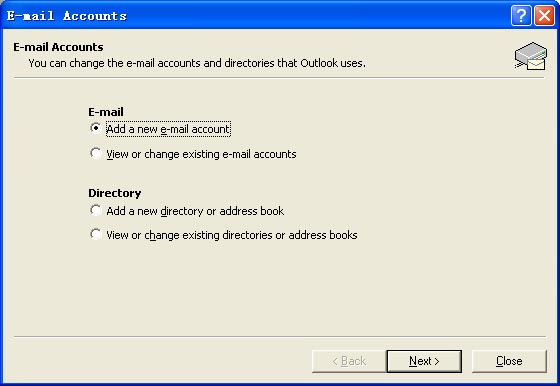
2. In the E-mail Accounts dailog box, select Add a new email account , then click Next button,
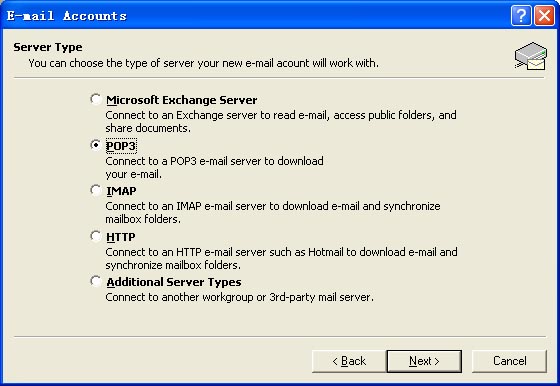
3. In the Server Type page, select POP3 option, then click Next button, it goes to the Internet E-mail Settings screen,
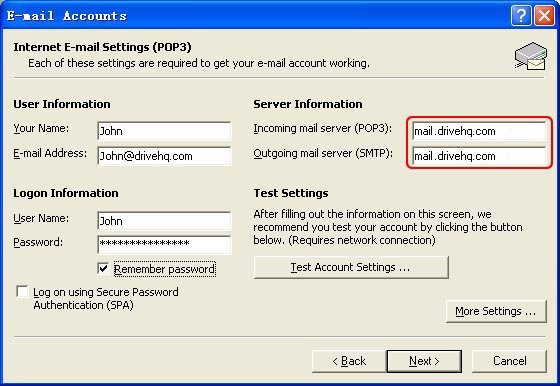
4. Enter all required information in the requird boxes. Firstly, enter your name and DriveHQ.com E-mail address, which is YourUserName@firstcloudit.com in User Information boxes. Then enter your user name and password in Logon Information boxes. If you seclect Remember password option, you do not need to enter your account info again the next time you lanuch Outlook. At last, please pay attention to Server Information boxes. Enter the POP3/IMAP4 server and SMTP server that provided by DriveHQ.com, both POP3/IMAP4 and SMTP servers are mail.firstcloudit.com .
5. Click Next button, you are almost done configuring your DriveHQ email. Click Finish button to finish the configuration process.
6. DriveHQ outgoing server requires authentication, so you must configure the outgoing server. Firstly, in the Tools menu, click E-mail Accounts , then click Next button to turn to Internet E-mail Settings page. In this page, click More Setting button, select Outgoing Server tab, and seclect My outgoing server(SMTP)requires authentication that shown as below. Click OK and close the dialog. You are ready to use DriveHQ email.