iOS Scanner App (by iFunPlay.com) is a popular scanner app for iPhone/iPad.
It is available on App Store for free; a more advanced version "Scanner App + Scan Doc Fax PDF" is available for $2.99.
Download ScannerApp (by iFunPlay) from App Store
WebDAV is the most popular way of mapping cloud drives on PC and Mac. It is an open standard protocol supported on all platforms.
You just need to find a good WebDAV server.
DriveHQ is a leading Cloud File Server/WebDAV Drive Mapping service provider.
In this document, we will talk about how to configure iOS Scanner App (by iFunPlay.com) with DriveHQ's WebDAV Server.
The information is also useful in configuring other WebDAV client applications.
Step 1: Get WebDAV Server / URL.
To use iOS Scanner App (by iFunPlay.com) with DriveHQ WebDAV Server, you must have a DriveHQ account first.
If you don’t have a DriveHQ account, you can:
- Visit www.DriveHQ.com website to sign up for a free account. The free account does not expire,
but it has some restrictions.
- If you are an administrator, you might want to create sub-accounts for your users, incl. employees and external clients.
A sub-user of a paid Group Account is considered a paid account.
The next step is to create/get your secure WebDAV URL. Log on to DriveHQ.com website, then from the Start Menu, click "Drive Mapping URL".
See the screenshots below. (Desktop browser and Mobile browser).
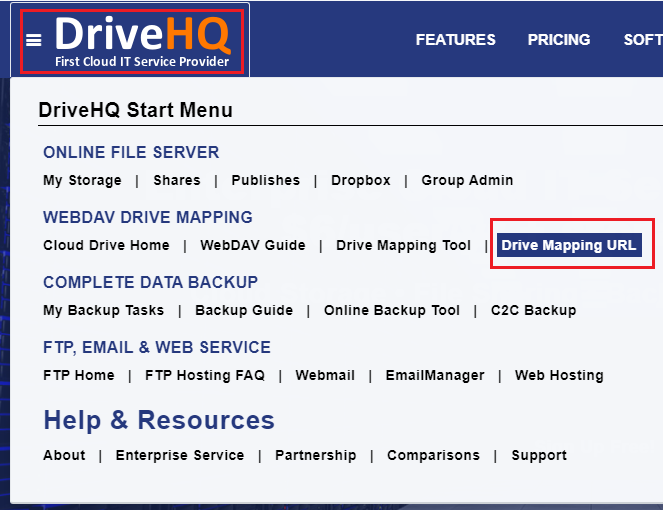
Get WebDAV URL from Desktop Web Browser
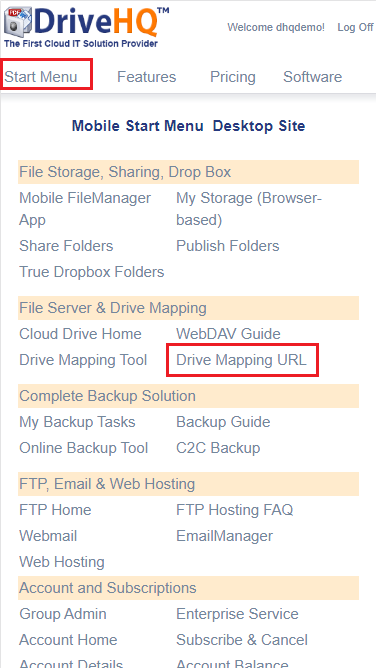
Get WebDAV URL from Mobile Web Browser
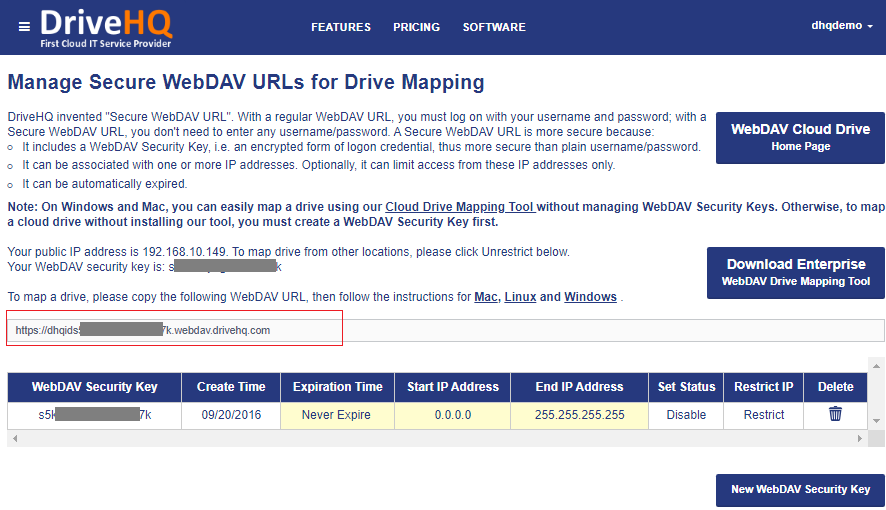
After you click "Drive Mapping URL", it will display the "Create/Manage Secure WebDAV URL" page as follows. (If you don't already have a Secure WebDAV URL,
you can create one. Note the WebDAV URL can be limited to certain IP addresses.)
Step 2: Add New WebDAV Connection/Site
Launch iOS Scanner App (by iFunPlay.com) on your iPhone/iPad, you will see the following initial screen:
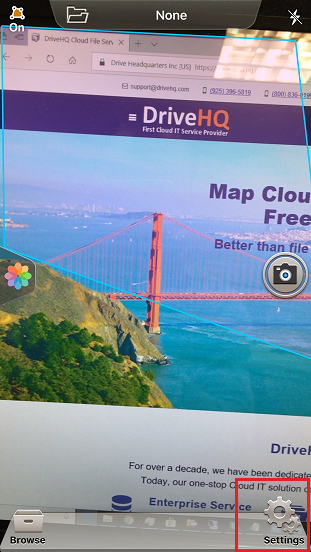
Tap the Settings button as shown in the above screen, it will display the "Settings" screen as follows:
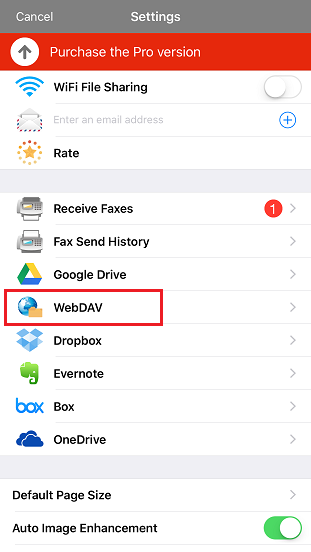
Tap WebDAV, it will display the "Setup WebDAV" screen as shown below:
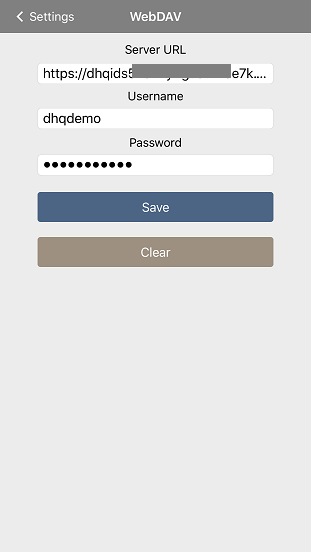
You can enter the WebDAV server/account info as described in the above screenshot. Make sure to use your own username and password.
The WebDAV Server name/host URL is available in the Step 1. It is recommended using HTTPS URL.
Tap the "Save" button to save the WebDAV Server and account info. After that,
you can export / save scanned files to DriveHQ WebDAV cloud storage.
If you incorrectly configured the WebDAV server/account info, you can edit it from the same Settings page.